 The most unpleasant breakdown in a washing machine is a malfunction of bearings and seals, accompanied by a grinding noise, noise Or a whistle. The problem is that repair and replacement is very labor-intensive, as it requires completely disassembling the washing machine. But even that isn't a big problem.
The difficulty lies in disassembling the car's fuel tank. Of course, if you have a warranty, you shouldn't attempt this yourself, but if the service center refuses to help, there's no other option. This refusal is most often due to the car's non-removable fuel tank.
There's a lot of information online about disassembling a washing machine drum, including videos and tutorials. After reading and watching, many washing machine users are confident in the process.
In reality, things don't turn out so beautifully due to a multitude of nuances, without which you can ruin your assistant so much that no specialist will take on the job.
So, to get to the bearings, you will need to disassemble the drum of the Candy, Zanussi machine, lg and other models. But you still have to get to it. To do this, you'll need to remove almost all the parts, otherwise they could be damaged during operation or simply interfere with its removal.
Rules for disassembling the tank
It is necessary not only to know how to disassemble the drum of a washing machine, but also to prepare for it properly.
While working, do not forget that:
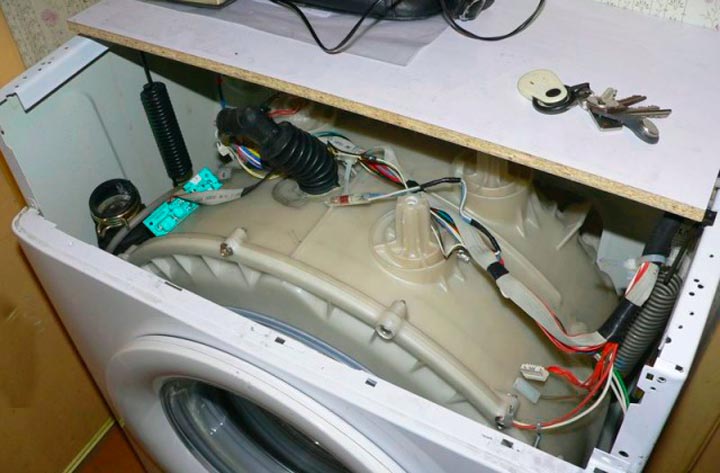
 Remove the drum and tub from the washing machine very carefully. Most modern tubs are made of plastic, and this material is susceptible to even the slightest mechanical impact. You may need a friend's help when removing the tub.
- If your tank is non-separable, you'll have to saw it off. Before doing this, it's recommended to drill numerous holes along the seam using a thin drill bit for reassembly. This will prevent the halves from shifting and ensure a good seal. Be sure to stock up on sealant.
 When cutting a tank, it is forbidden to make a bevel to the side, even by a couple of millimeters.
- The screw that holds the drum pulley in place can't be removed without force. However, excessive force can easily strip the head, causing further problems.
- The rear part of the part can be removed from the shaft by lightly tapping it.
- If bearing If the part is stuck, a car puller can help. It's okay to heat it with a blowtorch before removing it.
What do you need to disassemble the drum?
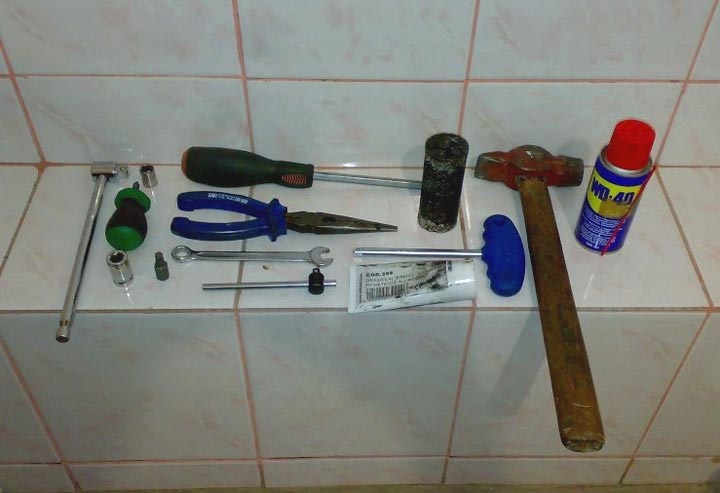
The tools needed to repair and replace bearings are simple. Most homes and garages have them, or at least a neighbor might have some. You'll need:
 set of screwdrivers;
- set of keys;
- car puller;
- a blowtorch or a gas burner, although this option is not the best due to the lower heating temperature;
- drill with drill bits;
- nippers;
- wooden block;
- hacksaw with blades;
- copper hammer;
- WD-40 lubricant.
How to disassemble a washing machine drum
Disassemblable tank with drum
Modern models often feature removable tanks. This is convenient for washing machine repairs and significantly simplifies the work for technicians.
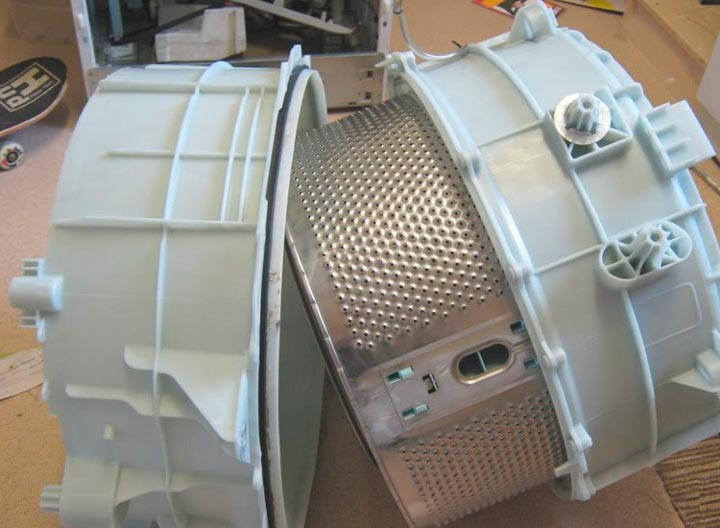 The detachable tank consists of two halves connected with bolts using sealant or rubber sealing material.
Disassembly drum The washing machine looks like this:
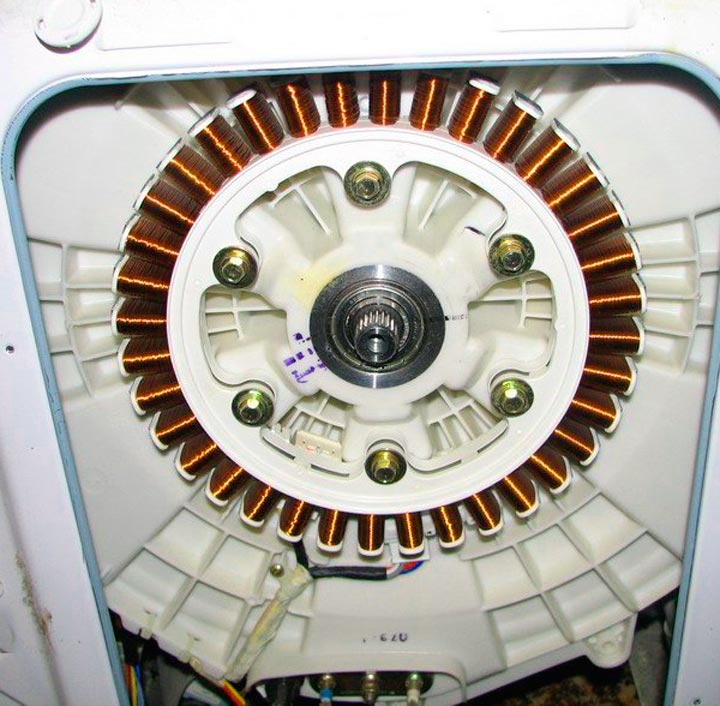
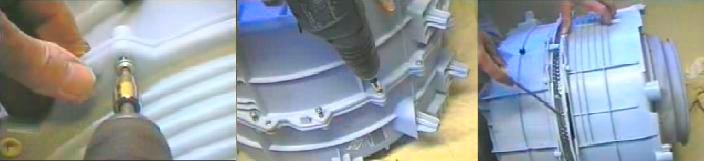
- Using a wooden block, you need to lock the drum pulley, while the hatch should be located at the bottom.
- You need to unscrew the bolt that secures the pulley to the shaft. To do this, use a socket with a ratchet of the appropriate size.
- The bolts connecting the two halves of the tank are unscrewed using a wrench, after first removing the pulley.

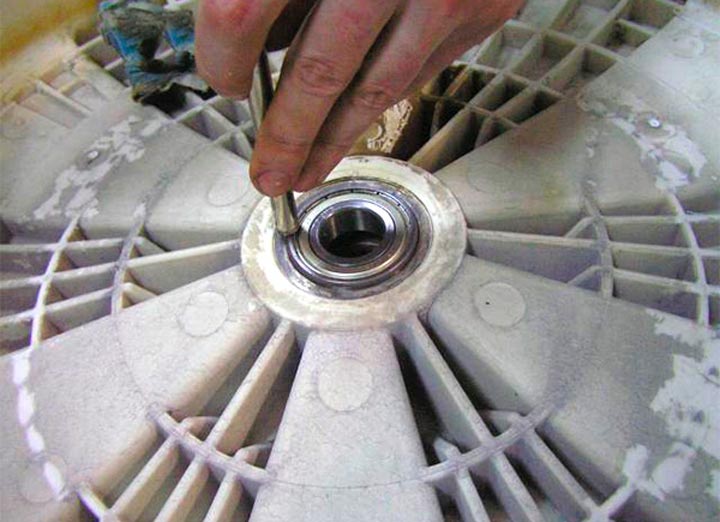
- After this, by lightly hitting the shaft, the rear part of the part is removed.
- The bearings are pulled off; if difficulties arise, they are then heated with a blowtorch and removed using a puller.
How to disassemble a non-detachable washing machine drum
The process is similar to disassembling a collapsible tank, the only difference being that it requires sawing. This is difficult, painstaking, and thankless work. The lack of suitable tools for such work creates a major problem.
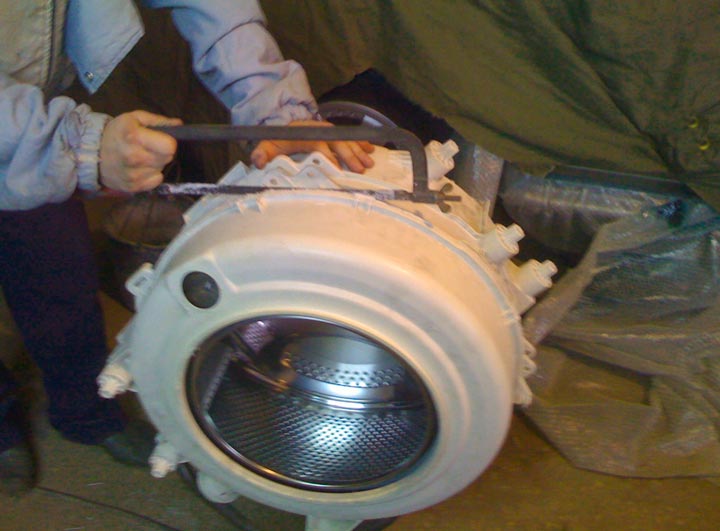 A hacksaw is difficult to cut metal with; it often gets stuck and breaks. However, despite this, it's considered the most optimal and proven option. Experts recommend wrapping one end of the hacksaw with electrical tape to facilitate the process, which will take at least 3-4 hours.
The wood saw cuts so thickly that it is difficult to ensure the seal between the two halves later.
An angle grinder is completely ruled out due to the high risk of damaging the part and deep penetration.
A jigsaw can help unless you have a hard to reach area where you'll need to use a hacksaw.
Keep in mind that before you disassemble the washing machine drum, you'll have to spend a lot of time removing it from the machine. Expect a lot of work and plenty of time.


