 Washing machines sometimes break down, especially when they are operated under heavy loads.
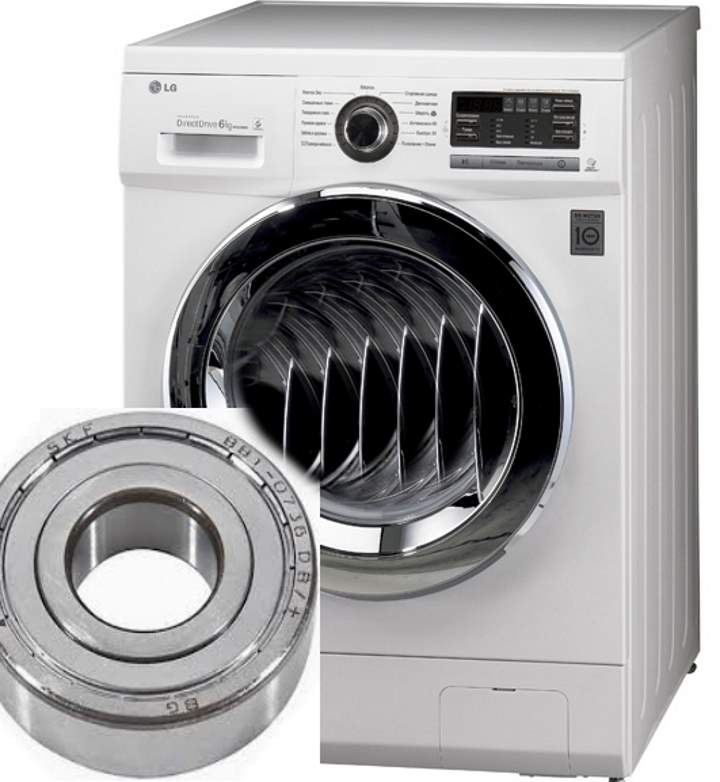
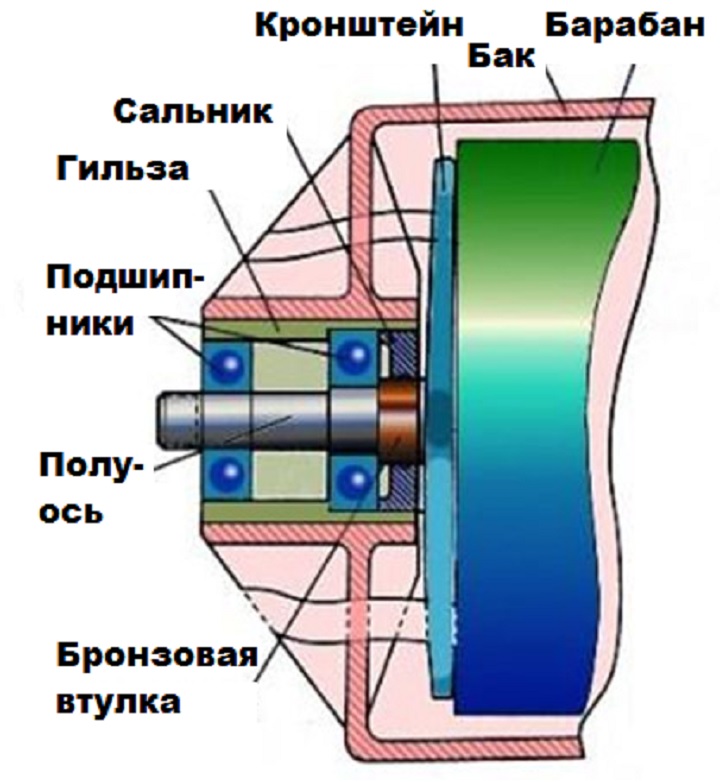
If your washer starts knocking, creaking, squealing, and the sound gets louder with each subsequent wash, the diagnosis is clear: the bearing in the washing machine is humming.
This part is vulnerable and is not immune to wear and tear. Well, it will have to be repaired.
Solving humming problems
There are two possible solutions to this problem.
- The first is to contact the service.
 You can also call a technician to your home. While this will save you a headache, it will also cost you some money to repair your appliance.
 - The second is self-replacement.
This is more cost-effective, but much more time-consuming. Still, replacing a bearing in an LG washing machine isn't an easy task, but it's doable. Especially with proper preparation.
Stock up on the following.
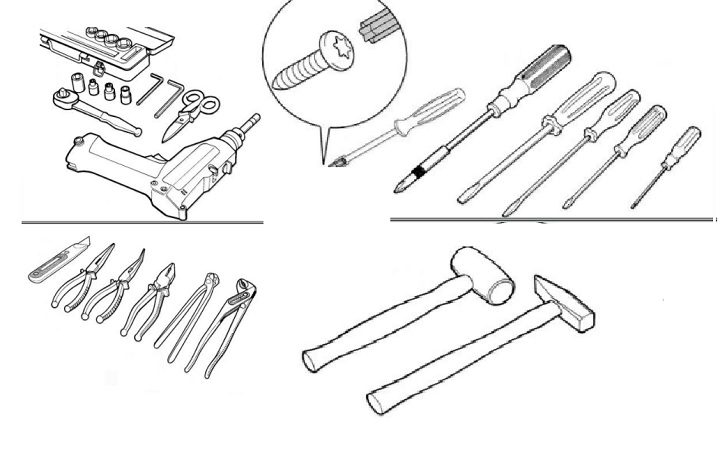
- Tools.
 These will be pliers with screwdrivers, various keys, a chisel (punch) and a hammer, WD-40 lubricant and liquid soap.
 - Instructions.
In addition, it is possible to have an assistant who will assist in disassembling/assembling parts of the washing machine. - Spare parts.
You will have to buy a drum bearing and seal for the LG washing machine.
Due to frequent wear and tear, the oil seal will also require replacement.
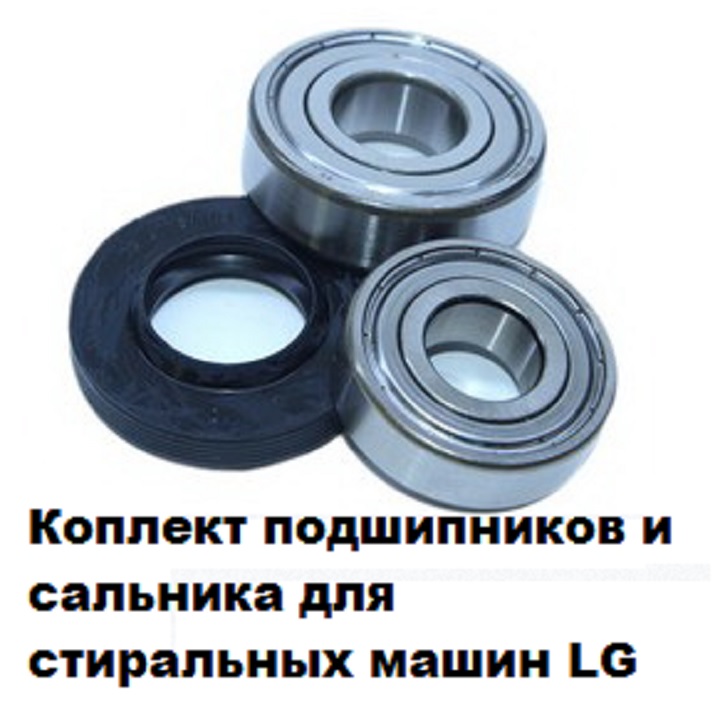
You need to pay attention to the parts you purchase; they must match the bearings used in the specific model of washing machine you're repairing. In this case, it's for an LG washing machine.
LG Washing Machine Bearing Replacement Process
How to disassemble a machine?
Before starting work, you must disconnect the equipment from the power supply and disconnect all hoses.
The washing machine is installed in a position with free access to it from all sides. The goal of this stage of the work is to get to the tank and replace the bearing.
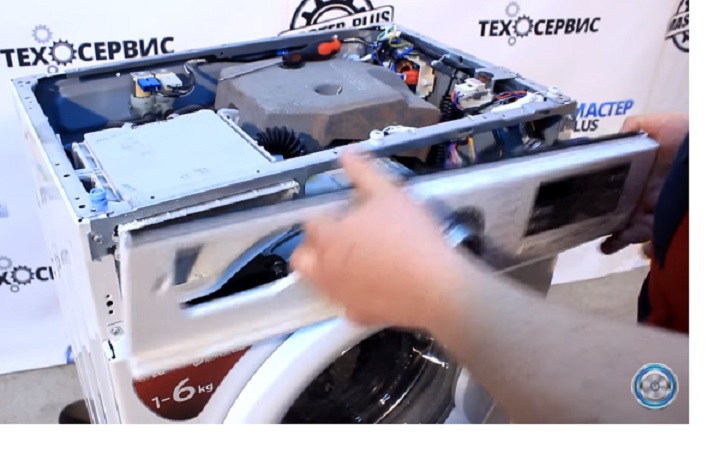
 Remove the top cover. To do this, unscrew the mounting screws on the back panel. Now you can slide the cover toward you and lift it up; it will easily slide free of the retaining clips.
- The detergent drawer is now open. It can be accessed by pressing the central latch with your finger, and the side screws can be removed with a Phillips-head screwdriver.
 You should unscrew the holders and disconnect all the wires, which can be easily unhooked by simply squeezing the latches.
- The top cover is held in place by clips along the top. These clips are pressed and lifted, tilting the panel slightly toward you. The wires disconnected in step 3 are pulled out through a special opening, and the cover slides easily to the side.
- Now you need to open the door and use a screwdriver to pry up the clamp spring located under the drum seal (rubber band). The clamp should be pulled out, and the detached seal should be tucked into the drum.
- Pay attention to the lock. It has a connector on the back with wires. We disconnect them too. How? Find the latch and press it to disconnect the wires.
- After closing the door and using the screwdriver again, open the service panel cover where the hose is located. Remove the plug, drain the water from the hose, and replace it.
- Let's begin removing the cover, which is held in place by a screw, so it can be unscrewed. Then, unscrew the four screws at the top. Be careful! When you're finally unscrewing the screw, it's best to hold the panel steady, otherwise it will fall.
- The cuff. You need to do almost the same thing as with the hatch: remove the retaining clamp. Again, you'll need a screwdriver to pry up the spring and remove the clamp. All that's left is to remove the cuff.
- The heaviest component is the tank. To reduce its weight, we recommend removing the counterweights by unscrewing the screws.
- Now you can disconnect the tank hoses.
- We remove the thermistor by pressing the connector latch.
- We've reached the heating element. To disconnect the power elements, you need to cut the zip tie with wire cutters. After that, unscrew the grounding contacts.
- Pay attention to the back cover. Remove it by unscrewing the bolts.
- This stage of work involves disconnecting all elements that are connected to the tank - pipes (drain and water level sensor); screws; wires.
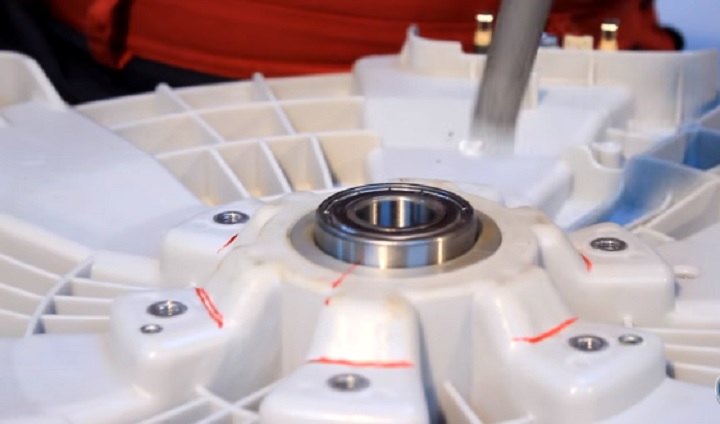
- The rotor is removed after unscrewing the retaining bolt.
- The stator is also removed after the screws are removed. The part should be tilted downward and freed from the wires.
- Both shock absorbers are held in place by pins, so we remove them by inserting a wrench and squeezing the locking tabs. Now pull the part toward you with pliers. The shock absorber will release and drop down.
- The front shock absorber can be removed using a socket wrench, and the pin at the back can actually be pulled out with pliers.
- The final piece is the tank. It's held to the frame by side springs, which can be removed by flipping open a cap. The tank is lowered down, and the springs are removed.
The hardest part is over, and it's time to move on to replacing the LG washing machine bearing yourself.
How to change a bearing?
This task will seem easy.So, let's begin.
- The drum must be placed on a high surface (default stability).
- There are bolts around the perimeter that need to be unscrewed.
- The front part is removed.
- Remove the broken part. If it doesn't come loose, then after applying grease, hammer it out. To do this, place a block on the shaft and hit it with a hammer.
- The other half of the tank is also removed, and it would be a good idea to clean off any dirt or scale with a brush. A wire brush is preferable.
- The oil seal is removed.
- The grease is taken and poured into the bearing seats.
 Using a punch and a hammer, the bearing is removed from below through the top.
- To get to the outer bearing, you will have to turn the tank over.
- Be sure to clean the seating area.
- Failed parts are disposed of.
- The parts to be replaced are taken and a light coating of soap is applied to them.
- The bearing is inserted into the seat and driven in with a rubber hammer.
- An outer bearing is also inserted.
- Lubricate the seal with grease and apply soap to the edges. Press down with your fingers to press it in.
This completes the process of replacing bearings on an LG washing machine.
The only thing left to do is to reassemble the machine in reverse order, following the instructions.
What not to do when repairing LG washing machine bearings
To avoid problems with repairs and the continued functionality of your LG machine, it's important to be aware of the mistakes inexperienced technicians make.
What problems arise?
- When removing the front of the car, the sunroof lock sensor wires often come off.
- When trying to remove the cuff, the part breaks, since the removal of the clamp is often forgotten.
- Strong impact on “stuck” screws without prior lubrication or heating will cause them to break off.
- The wires near the temperature sensor are broken.
- The filler neck comes off with the hose.
- They damage the drum, which leads to its replacement.
In conclusion, I'd like to say that you can, of course, repair your car yourself, but if you have persistent doubts and no experience, it's best to play it safe and use a service center.


