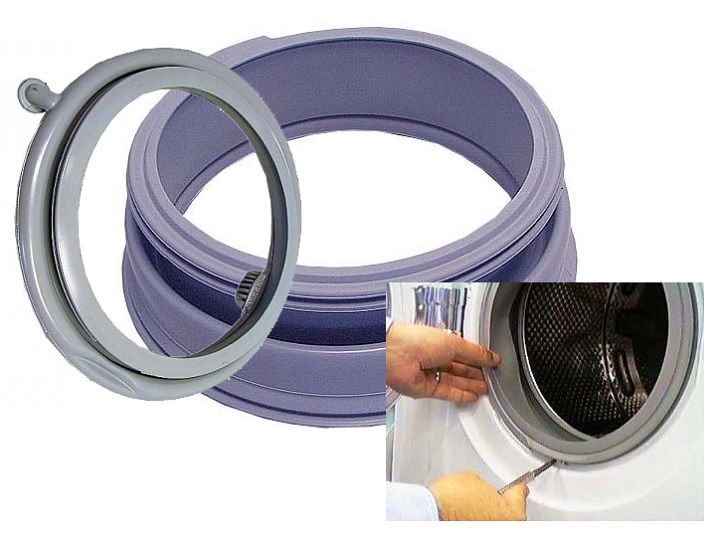
 The cuff is a necessary and important detail.
It is this that protects the car's electronic device from moisture.
The function of the cuff does not end there; it prevents water from leaking out of the machine by sealing the hatch door.
Therefore, if the rubber seal breaks, you must not delay, otherwise it threatens the failure of the washing machine and more expensive repairs. It's time to learn how to replace the cuff.
When to change the cuff
There are several signs that indicate the need to replace the cuff.
- If a puddle appears on the floor near the loading hatch while the washing machine is running.
- If the hatch does not close.
- If you hear knocking and hissing sounds while the machine is running a program.
This is dangerous because of a short circuit; work must be stopped immediately and measures taken.
Causes of cuff damage
The cuff in the washing machine may become physically worn out or mechanically damaged.
What are the possible causes of damage to the sealing rubber?
 Foreign objects (keys, coins, pins, bra underwires, etc.) getting into the machine during washing.
- Washing hard items – sneakers, caps with hard visors, heavy outerwear.
- Use of cheap detergents containing harsh chemicals.
- Careless handling of the equipment, resulting in seal deformation, such as disregard for the rules for loading laundry and washing programs.
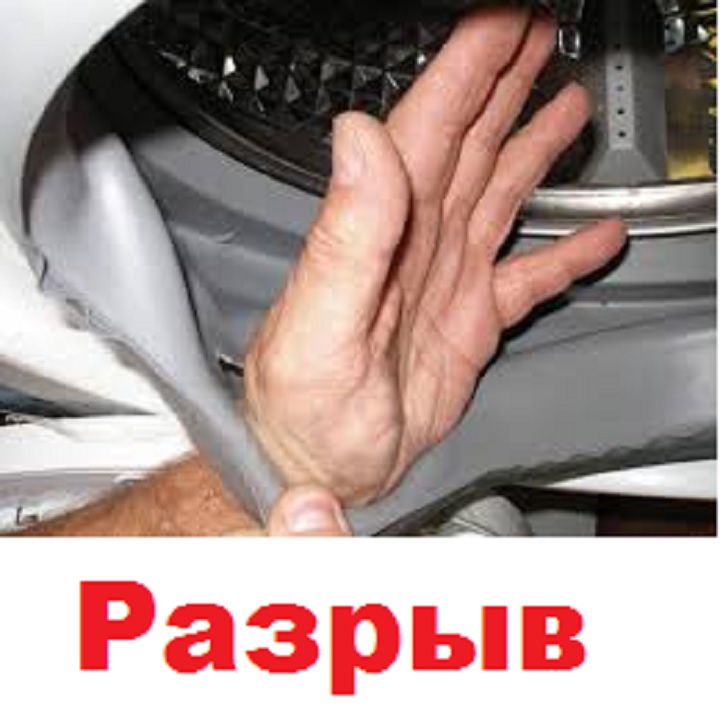
What should you do if holes appear in the seal or the adhesion to the drum is compromised? The answer is simple: replace it. But is it possible to replace the rubber seal in your washing machine yourself? Yes, you can.
How to replace the rubber seal in a washing machine yourself
Replacing the cuff takes place in two stages:
- dismantling the old cuff,
- installing a new cuff.
The tools you will need are screwdrivers and a new part.
The repair will take no more than 1 hour.
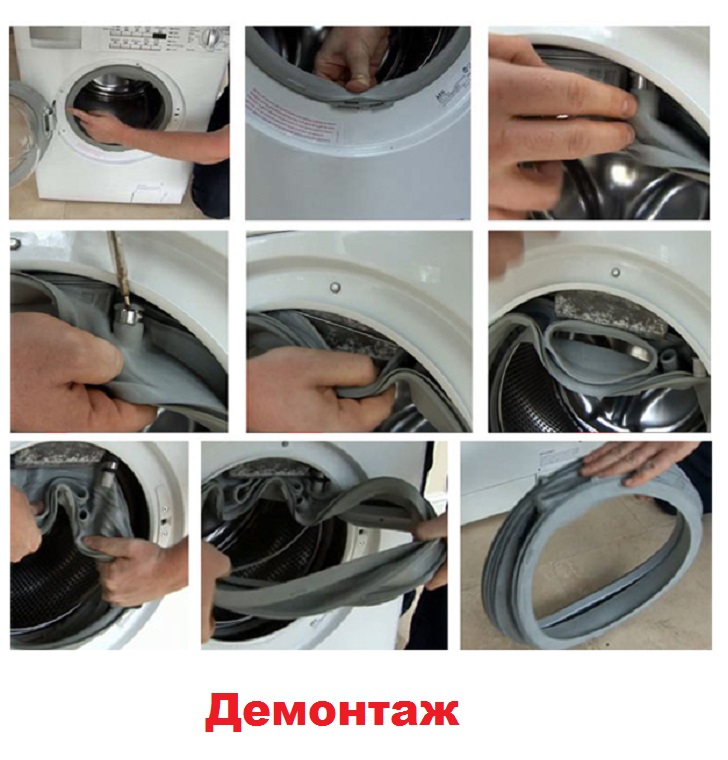
Stage 1. Removing the old cuff
- Removing the retaining clamps. The front clamp is attached to the body with a spring-loaded ring in a groove in the rubber band. Use a screwdriver to pry it up and gently pull it toward you. There's no need to worry about damaging the ring, as it stretches. Then, holding the fastenings, remove the rubber band, bending its outer edge inward.
 To proceed, you'll need to disassemble the front panel of the machine by unscrewing the screws. It's easy to remove; simply lift the panel and pull it toward you. At this point, disconnect all the wires leading to the hatch lock. If this isn't possible, then remove the lock itself.
- The wash tub seal is held in place by a spring-loaded ring similar to a clamp and is removed in the same manner. Some models have a seal connected to the hose. This needs to be disconnected. The seal is then removed from the tub.
- The edges of the tank must be thoroughly cleaned to remove any dirt. A soapy solution can be used for this.
Stage 2. Installing the new cuff
When installing a new seal, pay attention to the markings inside the rubber or the drain holes. They should be installed facing downwards.
- To easily attach the cuff, first pull it over the fuel tank neck with the longer side. Then insert the inner clamp and secure it in place. Don't allow it to fit too tightly, otherwise it may wear out.
 The cuff's smaller side is pulled over the front edge and straightened. Next comes the front clamp.
- The question of how to replace the rubber band on a washing machine has been resolved.
- Now's the time to check the repair quality and run the rinse cycle for a couple of minutes. After that, you can turn on the drain and tilt the appliance sideways to check the underside of the rubber.
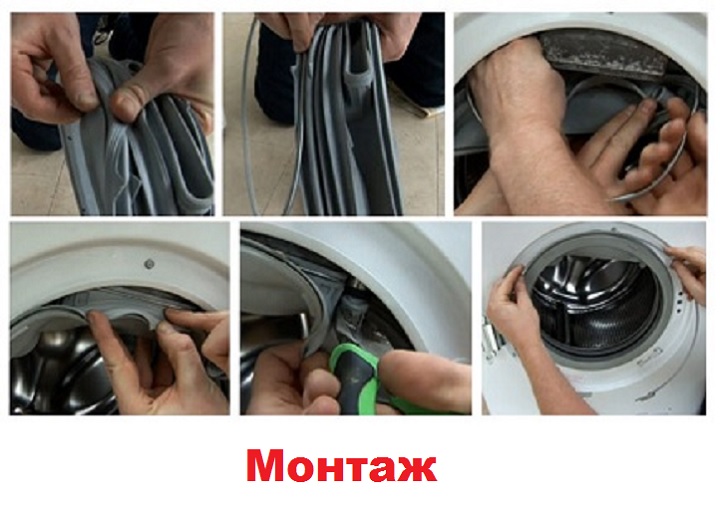
No leaks? Congratulations, the repair was a success!


